Josh and I love listening to podcasts and back in March I found myself listening to Underground Wellness and the host was interviewing Tom Malterre <—link to the interview. I had never heard of him or his wife Alissa before and was immediately intrigued by their book The Elimination Diet he was promoting.
Tom holds both a bachelor’s and master’s degree in nutrition from Bastyr University, has advanced training from the Institute for Functional Medicine, and over a decade of clinical experience. His wife Alissa is the blogger behind NourishingMeals.com. This website is filled with healthy, wholesome, gluten-free recipes. Check out her recipes. They are great!
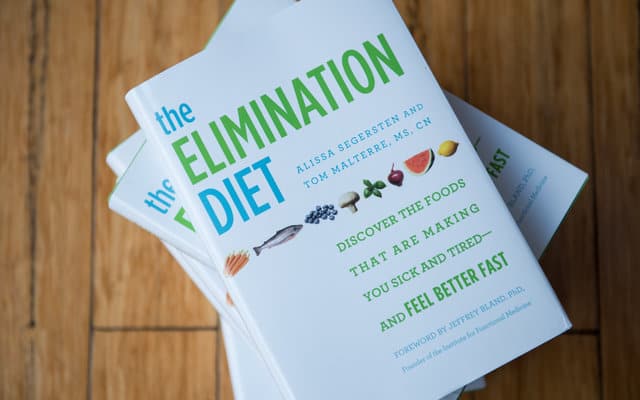
Normally I am not one to run home and preorder a book but after listening to Tom talk I was convinced that I needed to have a copy. The premise of this book is to discover the foods that are making you sick and tired so that you can feel better fast. Sounds pretty great, right?
Both Josh and myself had reached a point where we were willing to try something drastic if it meant seeing changes in how we both felt. I had been dealing with chronic skin issues around my eyes and lips that would leave my skin red, irritated, and flaking off. It was pretty horrible and painful. Josh has had awful sinus congestion since I have known him. His nose is constantly stuffy. If you came to our house you would see the kleenex boxes in every room.
In April our family embarked on this journey to hopefully eliminate some of our skin, sinus, and digestion issues. We understood that this was going to be a process and we committed to giving 100% to this effort.
In order to be successful there are several major things we needed to be able to commit to:
- Say goodbye to genetically modified foods. If you are unfamiliar about why this is a big deal here is a brief explanation. GMOs are organisms that have had a sequence of its DNA changed so it will produce different proteins. When I started really reading and researching about this I have never been more disturbed. Visit Nourishing Meals GMO-Free to read about why this is important and how to avoid GMOs or check out My City Was Gone
from your local library to learn how Monsanto completely destroyed an entire town and how the town fought back and won a multimillion dollar lawsuit.
- Say hello to organic! This was one of the big ones I was worried about. The main concern being $$$. But we have done it and honestly we are only spending slightly more because we haven’t been out to eat since April. I am still very amazed and proud of us that we have eaten all our meals at home and we have cooked all of them.
- Reducing our chemical exposure. We packed away all our plastic water bottles and storage containers and invested in stainless steal or glass. Our cleaning supplies are already very non toxic so that wasn’t a drastic change for us and we switched up our toothpaste and toiletries to make sure they didn’t contain any parabens.
- Use supplementation to support your diet. Oh my! This one was really tough for me. I am supper picky about supplements. Like very picky. If it hasn’t been third party tested it doesn’t come into our house and we won’t buy it. If you are unfamiliar with third party testing it is where a company pays for an outside source to test their products to verify what they say is in the bottle is actually in the bottle. I was relieved to see the products recommended for use in this book were from Thorne
which is a very great company who uses third party testing.
- Upgrade your kitchen (if needed). We own a food processor
and Vitamix
and cast-iron skillet
. Thankfully I was familiar with most of the items on the shopping list even if they weren’t staples in our pantry.
- No cheating. If you cheat on this plan you will alter the results. I like the quote in the book “100 percent effort equals 100 percent results”. The smallest bit of irritating food can set off your immune system. You will not be able to pinpoint the foods that work and don’t work with your body chemistry if you cheat. If you think you might cheat or feel that it would be ok to cheat don’t do this diet. It isn’t worth the investment of your time and money for just a few weeks if you know you are going to go back to eating the same way you were before you started.
If you had told me 8 years ago before my husband and I were married that we would be doing this I would have had a really hard time believing you. Josh works for the fire department and every shift the entire crew pulls their own money together to buy food for the days meals. Josh loves eating at work with his crew and cooking for them. I have to give praise to my husband on how committed he has been during these last few months. He has brought his meals and snacks from home every shift day. Not an easy feat to accomplish by any means and I am super proud of him.
It has been over 3 months since we have started. All of our meals that we have eaten have been cooked by myself or Josh in our home. It has been a huge commitment but I can now gladly say that all the time, energy, and money that was spent has been well worth the effort.
What does this exactly looks like?
There are 3 phases to this program. Phase one is a two day detox which is all about the smoothies and soups. I skipped this phase because I was breastfeeding but Josh did this detoxification. We planned this to land on his 4 days off from work. Phase 2 is feeding your body with neutral foods and lasts for two weeks. We are currently in Phase 3 and this is when you reintroduce foods back into your system. You reintroduce one food every 3 days. If you have any symptoms during those 3 days you wait until the symptoms subside before you reintroduce anything else.
The book goes in to detail about why these foods are eliminated but the major foods you eliminate are…
- Wheat
- Gluten
- Dairy
- Corn
- Soy
- Alcohol
- Beef
- Pork
- Chocolate
- Caffeine
- Citrus
- Eggs
- Nightshades
- Tree Nuts
- Peanuts
- Sesame
- Sugar
- Yeast
I know that list can look very intimidating but I promise this is not a deprivation diet. You will feel amazing as you are healing your body. The book is written very well and the first half of the book gives the science and background about how the elimination diet works, preparing for the elimination diet, and how to heal yourself with this diet. The second half of the book contains the yummiest recipes! To me that is what sold me on this book. It guides you through the entire process and sets you up to have the best results possible.
Our favorite recipes from the book include brown rice tortillas, banana muffins, cucumber mint salad, coconut cinnamon roasted sweet potatoes, herb roasted salmon, chicken spinach burgers, chai spiced sunflower truffles, almond butter cookies, creamy rice cereal, coconut quinoa breakfast porridge, chicken apple breakfast sausage, and chicken vegetable soup.
I will also add that we followed this diet 100% while when went on a family vacation to San Diego. We had a full kitchen where we stayed and were close to a Whole Food and Sprouts. We planned ahead for our road trip and I cooked and baked for two days. Was it super fun to do that before we left. Not really, but it was pretty great knowing that we were going to be eating what we would have been eating at home. Deviating from the plan wasn’t an option for us and we made it work. You can make anything work if you are committed.
Our results
We are still in the elimination process. We have yet to introduce dairy, wheat, gluten, alcohol, or caffeine back into our system. What I can tell you is that based on the items we have introduced I have discovered several items my body does not agree with.
The first being citrus. I was so surprised by the massive stomach cramps I had. Horrible cramps where I was doubled over in pain. The worst part is I was drinking lemonade and lemon water every single day prior to starting this program. Crazy. Yeast also gave my really bad stomach cramps. Go figure, I was having kombucha daily.
When I introduced eggs back in my body started producing gas. It wasn’t fun or pleasant. And I immediately knew it was the eggs because it was the first time this had happened since starting the program. I also had a major break out on my forehead and neck. I used to have eggs in some form every single day.
Josh is fairly certain he will react to either dairy, wheat, or gluten once we challenge those. He has been feeling amazing since we started and his sinus issues are gone!
My skin issues have dramatically improved and I can’t tell you how amazing it feels. My lips are 100% better and my eyes are 95% better. They only time my eyes bother me is right before my period. They flair up slightly but nothing that is noticeable, they are just itchy. I was dealing with constipation before we began this and now I can say that is not the case anymore and have become very regular. Yay!
I highly recommend The Elimination Diet and think it is a great resource. If you have any unexplained symptoms or are struggling with achy joints, irritability, fatigue, bloating, brain fog, or weight gain the foods you eat everyday may be to blame. I do believe that everyone could benefit in some way from this program.
PS…If you don’t already listen to Underground Wellness it is a great podcast! Check it out if you are into health, fitness, and self-care.