Precision Nutrition Level 1 Certification Review (PS…I Passed!)

I did it! I passed the Precision Nutrition Level 1 Certification! If you are unfamiliar with this certification it is an in-depth scientific based course on nutrition and how to successfully coach clients to achieve the results they desire. The course is self study and you can take the test whenever you feel ready.

Twice a year the course opens for enrollment. The cost of the certification isn’t cheap and is an investment at $800. In my opinion it is well worth the money. Several years ago I took NASMs Fitness Nutrition Specialization (FNS), this course is $499, and was disappointed with the content.

If you are debating between the two go with Precision Nutrition. I really dislike writing anything negative about NASM because I do believe they have an awesome CPT (Certified Personal Trainer) program. The PN1 course provides 1.9 out of your 2 CEUs needed if you are certified via NASM. That with your CPR/AED training provide all the CEUs needed to keep your certification current.

From the time I enrolled in the course, September 2013, to passing, July 2015 it took a several solid months of studying before I felt prepared to take the exam. So you may be wondering why did it take me so long to take the test? Initially my plan had been to study and take the exam before Maisie was born. That obviously didn’t happen. I severely underestimated my energy level and had no idea how sick I would be while I was pregnant. After she was born I battled postpartum depression and it wasn’t until recently that I pulled back out the books.

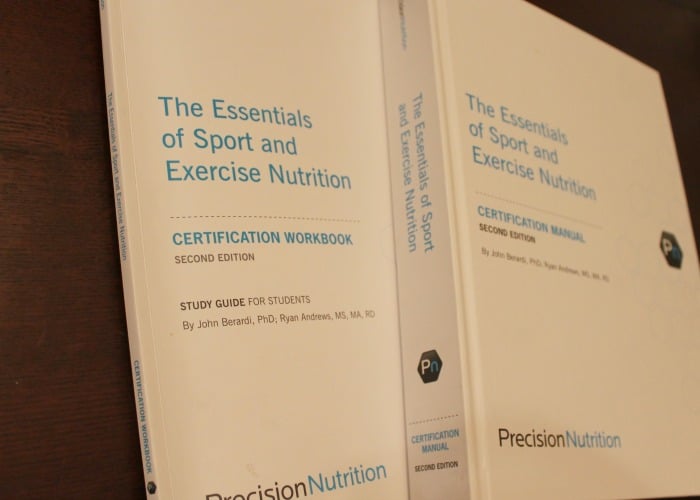
Precision Nutrition Book

To study I read the book, listened to the lecture, and followed up with the workbook study guide. After I completed everything I spent several hours reviewing the workbook. This was very helpful because the test is open book.

Unit 1 covers all the Nutritional Science information.

  • Chapter 1: Cell structure and function
  • Chapter 2: Food intake, digestions, and absorption
  • Chapter 3: Energy transformation and metabolism
  • Chapter 4: Energy balance in the body
  • Chapter 5: Aerobic and anaerobic metaboolism
  • Chapter 6: Macronutrients
  • Chapter 7: Micronutrients
  • Chapter 8: Water and fluid balance
  • Chapter 9: Special Needs

Unit 2 covers Nutritional Practice.

  • Chapter 10: Preparing for your client
  • Chapter 11: Collecting preliminary client information
  • Chapter 12: Interpreting client information
  • Chapter 13: Providing a nutrition plan
  • Chapter 14: Nutritional supplementation
  • Chapter 15: Setting behavior goals and monitoring
  • Chapter 16: Making nutritional adjustments
  • Chapter 17: Providing continuing education and support

Unit 1 contains so much information and took me twice as long to study. The time spent was well worth it because I was able to comprehend and understand the concepts as opposed to just reading the words and answering the questions in the workbook. Unit 2 was really enjoyable to read and contains great information on making behavior and lifestyle changes.

The test contains 50 questions from Unit 1 and 50 questions from Unit 2. You are given 2 hours to take the exam and have two attempts to pass. If you try to take the test without reading or doing the workbook thinking you can just use the glossary to look up answers I am not sure how you would pass. I needed the full 2 hours and the test timed out on me with several questions left to answer. I was so excited to pass the test on my first attempt especially with the test timing out.

If you’re reading this as a personal trainer and have yet to further educate yourself with a formal nutrition course I highly recommend Precision Nutrition Level 1 Certification. If you’re reading this as an athlete or a client who is working with a personal trainer check to see what qualifications your current coach has in regards to nutrition.  While program design of a training plan is important it is only partially effective unless paired with an intelligent nutrition program.

Here are just a few of the topics I found especially helpful in the course:

  • Detect hormal imbalances based on skin fold measurements
  • Supplementation guide – which are effective vs. not effective
  • Detect overtraining and how to fix it and prevent it from happening
  • Providing a nutrition plan
  • Vitamin and mineral deficiency symptoms

I can’t tell you how amazing it feels to be able to say that I passed and to know I accomplished this goal that has been hanging over me for so long. I am very excited to put this new knowledge to use and I would love to work with you and help you achieve your goals!

What can you expect from me as your nutrition coach?

  • No diets. That’s right, no diets. Diets aren’t the answer. You will have guidance from someone who will help you figure out what to do, when to do it, and be there to support you.
  • No fads. The nutrition coaching that I offer is personal and tailored for you.
  • No Templates. I will listen to you, pay attention, ask you questions, and be part of your team to ensure you are on track. This is what a great coach does.

How does it work?

  • 90 day packages available that include initial consultation and also bi-monthly follows up to monitor your progress.
  • Meet me via Skype, Google Chat, FaceTime, or phone to discuss your goals, progress, and questions.
  • Receive intake forms before initial consult and take your measurements bi-monthly.
  • This is a process. Each week you will be given a healthy habit to incorporate into your life to bring you another step closer to reaching your goal.

If you are interested in learning more about nutrition coaching or in setting up a consultation, please request information below.

[ninja_forms id=1]

Share

Pumping, Dumping, Freezing Breast Milk, & Bottle Feeding

Disclosure: The Workout Mama is a Joovy Moms ambassador and as such is provided with product for reviews. All opinions are 100% honest and my own.

Over the last 2 months I have been going to weekly doctor appointments to see my vein specialist for endovenous laser treatment and sclerotherapy. For this reason I have been pumping, dumping, freezing my breast milk, and bottle feeding my baby for 24 hours at a time.

When I became pregnant with Maisie I wore my compression socks everyday but by the end of my pregnancy my legs were bruised, discolored, and painful. We now had a healthy baby but my legs were a mess and I needed more treatments.

I went in for an ultrasound several weeks after Maisie was born to get the treatment approved by insurance and the morning pumping sessions began. Maisie hadn’t been waking up for an early morning feeding for several weeks when I started pumping. Every morning for the past 3 months I have set my alarm to ring at 5am.

Pumping is a commitment. Props to all you moms who do it full time.

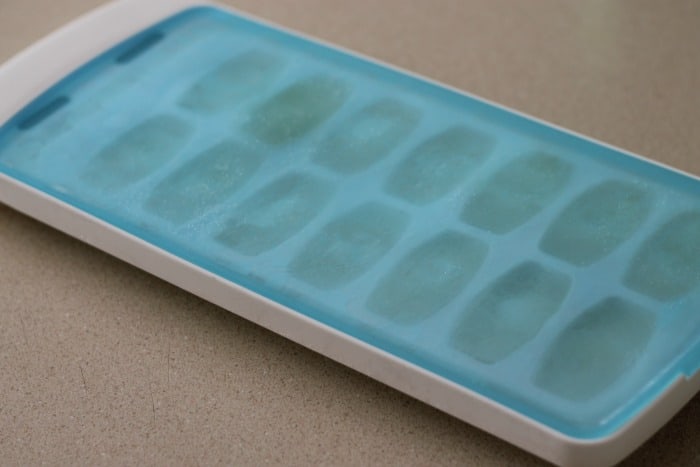
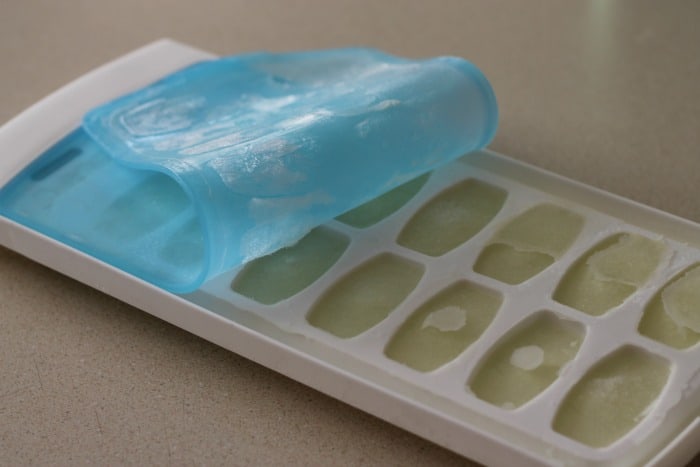
Each morning I pump 8 ounces of milk, I use the Medela Pump In Style Advanced breast pump, and proceed to carefully pour it into ice cube trays for freezing. The No Spill Ice Cube Trays I purchased have a silicone covering that acts as a protective barrier to prevent spills and freezer burn. Love these trays!

Breast Milk Ice Cube Tray

Freezing Breast Milk Ice Cube Tray

If you decide to use this method each breast milk cube = 0.5 ounces.

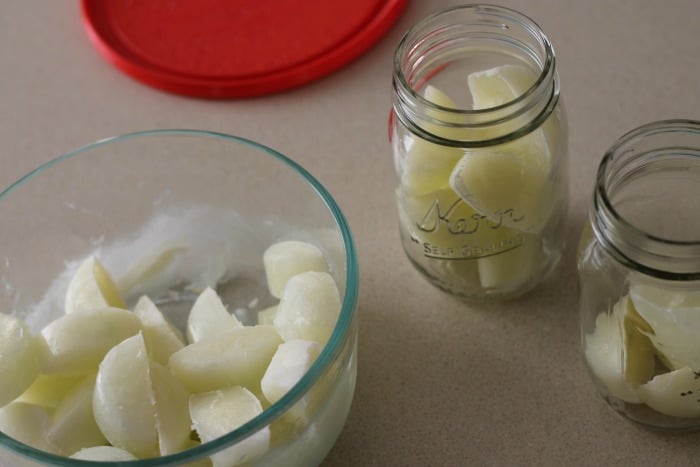
Once the milk is frozen I have been placing the breast milk cubes into glass storage wear in my freezer. I bought a set of various sized Pyrex Storage Containers.

Freezing Breast Milk

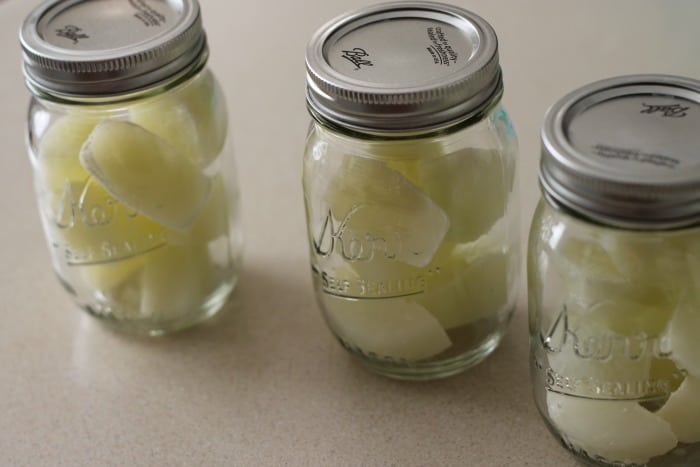
On days that I have been getting treatment I fill up mason jars with the appropriate amount of ice cubes for Maisie. Because I had been only nursing Maisie up until this point I didn’t have a great idea on how many ounces she was actually consuming.

Based off the recommendation of her pediatrician I offered 2.5 ounces of breast milk per pound of body weight each day. For example, Maisie weighs 12 pounds, I gave her about 30 ounces of breast milk in a 24-hour period. She is eating 6 times a day so I put 5 ounces of milk in each bottle. Some feedings she would drink less but for the most part 5 ounces each feeding worked out perfectly.

Freezing Breast Milk Mason Jars

When it is time to feed Maisie I remove a mason jar for the fridge and set it out on the counter 30 minutes before her feeding. After letting it sit for 15 minutes I make a hot bath for the mason jar by placing it inside a Pyrex Prepware 1-Quart Measuring Cup.

While the cubes are melting and heating up I occasionally swirl the milk around inside the mason jar. It is important to swirl and not shake the breast milk. Shaking causes the nutritional content of the milk to break down faster.

Heating Frozen Breast Milk

Once the milk is ready I pour it into my favorite bottles EVER. When Caden was an infant we bottle fed him occasionally but he hated it. Thankfully I was able to work my personal training clients and group fitness schedule around his feedings so he rarely needed a bottle. I was a little worried and apprehensive at how Maisie would be especially knowing that a bottle would be her only to way to nourished for multiple 24 hour periods.

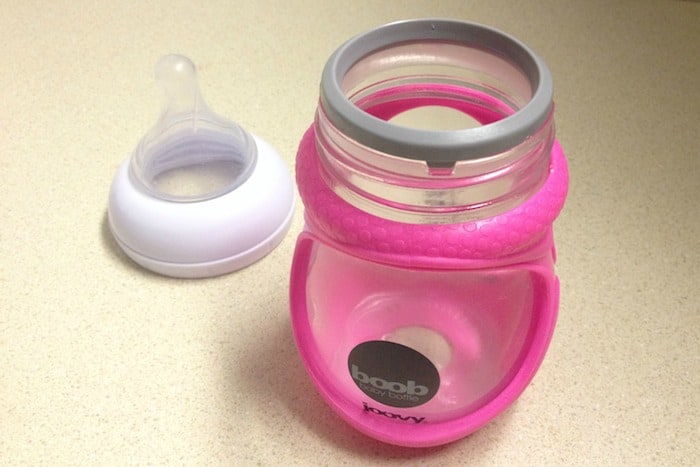
Shortly before my first treatment we tested out the Joovy Boob Baby Bottle and all my worries soon faded. She devoured the bottle without any discomfort or hesitation. This bottle is amazing! No leaks, easy to clean, and they come in a variety of materials ranging from high quality and medical grade polypropylene to glass.

Joovy Boob Baby Bottle

Joovy Boob Baby Bottle Glass

If you are on the fence about purchasing glass bottles I highly recommend these! We haven’t had any break and the protective silicone sleeve works great in case the bottle gets knocked around. The glass bottle when clean looks brand new even after multiple uses, no streaks or discoloration.

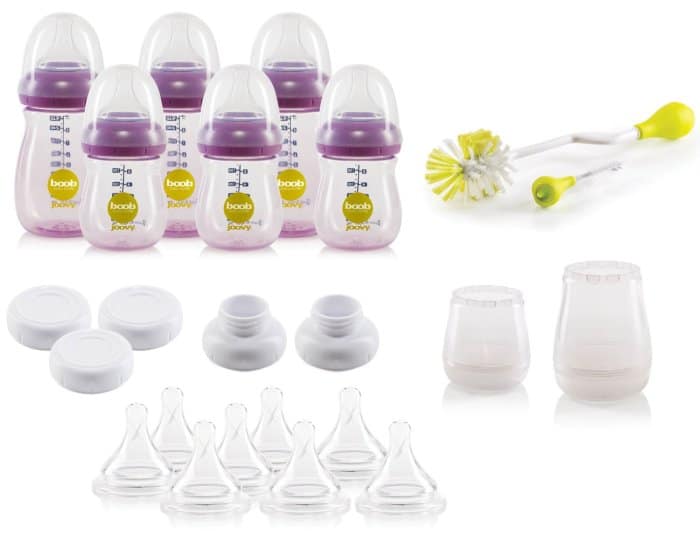
Like I mentioned earlier these bottles come in a variety of material and we also own the durable polypropylene plastic boobs. Each bottle is individually shrink-wrapped to deliver the highest level of cleanliness and is free from BPA, phthalate, and lead. Joovy has put together a Boob PP Baby Bottle Set that would be perfect for the mom who plans to bottle feed their little one, it has everything you need from 5 and 8 ounce bottles, brushes to clean, lids, pump adaptor so you can pump directly into the bottle, and extra nipples.

Joovy Boob PP Baby Bottle Set

Each of 5 ounce bottle comes with a stage 1 nipple. Maisie is 5 months and I still prefer this slow flow nipple to the medium flow nipple (sold separately). I felt that the stage 2 nipple, which is recommended for 3M+, was a little fast for her and still is. There is also a CleanFlow Vent Ring that is placed on the bottle before the nipple and collar are tightened. This is what ensures there is no leaks and also that the baby does not inhale additional air.

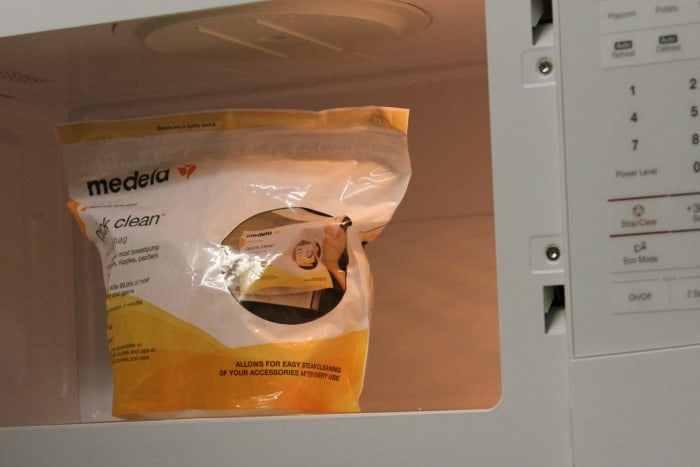
Cleaning these bottles is very easy. I rinse them out with a quick hot soapy scrub and place them into a Quick Clean Micro-Steam Bag. Super fast and kills 99.9% of germs and bacteria.

Quick Clean Micro Steam Bag

Heating up frozen breast milk, bottle feeding a baby, pumping, dumping, and cleaning the bottles takes me about 45-60 minutes total. It is time consuming but worth it. Since starting treatment on my legs they are already feeling so much better.

I only have a few more weeks of sclerotherapy left and then I will be able to put my pump away for awhile. I really love this bottle and it is great to know that we can leave Maisie for a few hours with family if we need or want to in the future. As far as transitioning from breast to bottle and bottle back to breast I could not be happier with my experience. Thank you Joovy for making a great product!

ABOUT JOOVY

Joovy is an american based company that is a family-run business that considers their employees, customers and factory partners as members of the family. Their goal is to design and manufacture family gear products that are extremely useful, practical, good-looking and FUN. You will not be disappointed if you decide to purchase this stroller or any other product from Joovy.

WHERE TO FIND AND BUY

Joovy Website, Amazon, Joovy Facebook, Joovy Twitter, Joovy Instagram

I would love to know what has worked for you! Any neat tricks or tips you have when it comes to pumping, freezing breast milk, or cleaning bottles?

Share

MuTu System 12 Week Online Program Review

This is not a sponsored review. I purchased the MuTu System 12 Week Online Program with my own money and have not been compensated for this post. I highly recommend this program and because I loved it so much I became an affiliate. This means that if you purchase this product from my links I will earn a small comission. Thank you for helping to support this blog and our family.
UPDATE JANUARY 2018 :MUTU System has launched a *BRAND NEW* program designed to flatten your tummy, stop annoying leakage, lose the weight you really wanna shift, heal your diastasis recti, feel fitter, healthier and sexier. The best bit is it takes 15 minutes a day! Since this post was written I have had another baby and wrote another post (with before and after pictures!) to share what I thought about the new program. Enjoy reading about my original experience with this program below.

When I was nearing the end of my second pregnancy I started to research how I wanted to strengthen and allow my body to heal after childbirth. I knew going into this pregnancy that my core just wasn’t the same as at had been since the birth of my first child. Planks in particular really caused me to struggle. I couldn’t figure out why I had this annoying cone shaped bulge in the middle of my torso whenever I would engage my core in planks or in yoga while on my mat, like in boat pose.

After having my babies I didn’t realize how greatly my body would be impacted and forever changed. I can remember teaching a yoga class 2 months after my son was born and showing a transition from lunge to side plank that just about took my breath away. I felt like my pelvic floor was ripping in half and had to drop down to my knees to recover.

Let me first say, being pregnant and giving birth is an amazing miracle and I am so thankful that both my babies were born healthy. For those of you reading this who are struggling with infertility my heart breaks for you and my prayer is that you will be able to experience the joy of being a parent in the future. Please know, I am not trying to tell a story of how hard pregnancy is or how horrible labor was at all but instead only want to convey that pregnancy does do some crazy things to your body.

It is so important to take care of yourself after giving birth. I strongly encourage anyone reading this who is thinking about becoming pregnant, currently pregnant, or just had a baby to allow your body time to heal. I love running, high impact exercises, and plyo workouts (think of exercises like squat jumps, burprees, and jumping lunges) but since Maisie was born (she is 17 weeks old today) I have not done any of those things. Eventually I will run and do burpees again but for now I am content with what I am able to accomplish with my body and that each day I am getting stronger and healthier.

ANATOMY OF THE ABS

If you have had a baby you might be one of the many women who have no idea that their abdominal muscles have separated and are still separated. Did you know that this could even happen? I had no idea until after I gave birth to Caden. As a personal trainer this was nothing I even learned about in my course work.

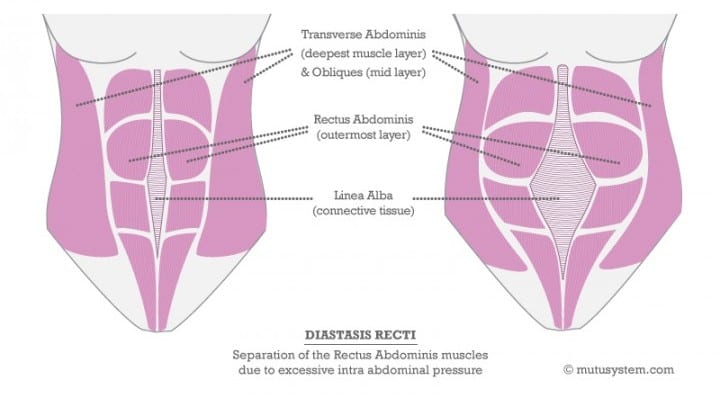
Take a look at the Rectus Abdominis both before and during pregnancy…

Diastasis-Recti-V3-720x484

The Linea Alba, the connective tissue between the right and left half of the Rectus Abdominis, stretches to accommodate the growing baby. For some women the gap closes naturally on its own. For others the connective tissue has become overly stretched and aggravated that it does not heal properly which leaves the new mama with an unwanted belly bulge months and even years after her bundle of joy has arrived. And for a mama who has multiple pregnancies the gap can become noticeably wider each time.

This gap is known as Diastasis Recti.

YOU CAN HAVE A FLAT TUMMY

While I do have a small amount of diastasis recti I have found that in order to encourage my tummy to become flat I can’t just focus on abdominal work.

Why you ask?

Because it will not re-train the core and pelvic floor. Crunches, sit-ups, and various other abdominal exercises will only put increased internal pressure on the abdominal wall and never allow you to achieve the tummy you want. No mom wants to have low back pain, an unstable core, a tummy that sticks out, and a pelvic floor that doesn’t work properly. Instead you must focus on adjusting your body’s alignment and stretch and strengthen your muscles to get a strong functioning core and pelvic floor.

The big question everyone asks is how do I do this?

Your body is a system. Everything works together. Muscles work together to support each other. So instead of only focusing on one part of the problem the entire system that supports your midsection needs to be addressed.

If you are looking for a way to heal, re-train, improve, and strengthen your core the MUTU System is the perfect program for you.

There are several programs available that focus on healing diastasis recti. I have looked into many of them. By far the best program that I have found and that I support is the MuTu System. The creator Wendy Powell is simply amazing. This program focuses on retraining the muscles in the body, healing the mommy tummy, and correcting the internal pressure.

You can get a free video with Wendy’s top 10 ab exercises by signing up on her website (top right corner).

The Mutu System offers several different programs, DVD + online training. I have the 12 week online program and love it! It never expires and I am currently doing it right now.

EQUIPMENT NEEDED

In order to do this program you will need the following items:

I used 8 pound weights for this program. I would recommend starting off with 5 pounds if you haven’t been exercising consistently and also getting a heavier and lighter resistance band so you can make your workouts more challenging as you progress each week.

Mutu System also just released their own MUTU Kit Bag that contains a resistance band, loop + small ball. Everything you need to get going with our programs. You will only need to purchase your weights separately.

WHAT’S THE 12 WEEK ONLINE PROGRAM LIKE?

Watch this trailer for a detailed look at the 12 week online program…

To be honest, I was skeptical about this program. I mean it sounded great and all, but I really wasn’t expecting to be as challenged as I was or to make a huge difference in my body. Once I started, I couldn’t believe just how weak and unstable my body had become since being pregnant and giving birth. This program has really challenged me. The workouts are fast paced and take 20 minutes total. I love that each week builds off the last and that every exercise progresses just enough that you feel challenged but not enough that it seems impossible.

THE RESULTS

So I know everyone is really big on before and after pictures. Don’t get me wrong, I am as well and will be sharing my 4 Month Body After Baby Update next week pictures included. In case you missed it you can read my Body After Baby: 1 Month Postpartum Update.

I think the biggest benefit of this program, even bigger than how you look, is learning how to improve how your body functions and feels. From day 1 of this program I have noticed improvements in my body and what I am able to do. Lunges were not something I could do easily or comfortably during pregnancy and after giving birth, but a few weeks into the program when lunges were added I could do them. I am so happy!

The abdominal separation that I had after giving birth has been reduced by a finger width. Overall I am stronger and my balance is much better because I am rebuilding core strength and retraining the muscles of and relating directly with my pelvic floor. When I do the core exercises and stretches before bed I have noticed that I do not have to get up to pee 5 times at night because I am learning to relax overly tight muscles and retrain the weaker stabilizers like my glutes and transverse abdominus.

Update: To see my before and after pictures read Body After Baby: 4 Months Postpartum

GET STARTED TODAY, 15% DISCOUNT CODE, & MUTUVATION 2014

Thank you Wendy for your creating this wonderful program! It has been such a blessing to me and I am excited to have been able to share how much I love the MuTu System with my readers.

If you are ready to invest in your health and re-train your core and pelvic floor you can get started today. That is the beauty of using a program that is all online!

UPDATE: Take a glance at the MUTU Store to purchase the online program. The 12 week online program cost is $147. Wendy, the creator of the MuTu System, was kind enough to offer a 15% off discount code to all readers of The Workout Mama.

Go and checkout the MuTu System and use the discount code tamara15 to save on your order.

If you live in LA, Houston, Chicago, or New York City you can join Wendy at MuTuVation. MuTuVation will inspire you to think, exercise, move and live in ways that will transform your well-being. If you are a mom this is for you. If you want to learn about the stuff you don’t understand about your body, the stuff you’d like to change about your body, what its OK to feel and look like after you’ve had babies, and whats not OK, and what you can do about it click the image below to find more details on MuTuVation. MuTuVation will be in Los Angeles on October 18th, Houston on October 20th, Chicago on October 22nd, and New York City on October 25th. All events will run from 9.30am until 4.30pm.


DISCLAIMER: The information provided on The Workout Mama is for educational purposes only. It is not intended to prescribe, diagnose, treat, cure, or prevent any disease. It is your responsibility to educate yourself and address any health or medical needs you may have with your physician. Please seek professional help when needed.

Share